
Easter Egg Dyeing
Natural and Homemade Dyes for Vibrant Hues

Easter is a time of celebration and traditions, with one of the most colorful being the dyeing of Easter eggs. This practice, steeped in history, has not only served as a fun family activity but also as a symbol of new life and rebirth in many cultures. While commercial egg dyes are readily accessible, a resurgence of interest in natural and homemade options is apparent. These environmentally friendly alternatives use ingredients found in the kitchen, offering a holistic approach to an age-old Easter tradition.
Natural dyeing techniques employ a variety of commonly found items such as fruits, vegetables, and spices to infuse eggs with a spectrum of vibrant hues. The process typically involves boiling the natural substances to release their colors and then allowing the eggs to soak in the dye to achieve the desired shade. The addition of vinegar often aids in setting the color, making the dyes more effective on the eggshell.
The adoption of natural dyes not only produces a unique palette of colors but also sidesteps the use of chemicals found in synthetic dyes. This approach resonates well with eco-conscious individuals looking to minimize their ecological footprint while preserving the time-honored ritual of Easter egg coloring. The method of using natural dyes for Easter eggs offers an enriching experience that connects the past with the present, fostering creativity and an appreciation for natural beauty.
The Significance of Easter Egg Dyeing

Easter egg dyeing is a tradition with roots stretching back to a rich tapestry of history and symbology. Historically, eggs represent new life and rebirth, making them a fitting symbol for the spring season and the celebration of Easter. The practice of dyeing eggs can be traced to ancient times and has evolved across cultures and centuries.
For families and children, the act of dyeing Easter eggs is a festive activity that allows for creativity and expression. Children revel in the transformation of plain eggs into vibrant works of art. These dyed eggs often become the stars of Easter egg hunts, where the colorful displays provide motivation and excitement for the young participants, as they search nooks and crannies for the hidden treasures.
Moreover, dyed Easter eggs serve as a centerpiece for many Easter celebrations. They add a pop of color and tradition to the holiday table. The use of natural dyes has seen a resurgence, as it aligns with a growing preference for chemical-free and environmentally friendly practices. Ingredients such as turmeric, beet juice, and red cabbage can impart beautiful, varied hues to the eggs.
Here is an overview of how different natural ingredients affect egg color:
Ingredient Color Turmeric Yellow Beet Juice Pink/Red Red Cabbage Blue
In conclusion, Easter egg dyeing is more than just a craft; it's a meaningful activity imbued with historical significance, an opportunity for family bonding, and a joyful addition to any Easter celebration.
Benefits of Natural Easter Egg Dyes
Choosing natural Easter egg dyes can have several benefits for both the environment and the user. Here is a look at some of the advantages:
Safety: Natural dyes, derived from food, vegetables, and fruits, are free from synthetic chemicals. They are generally non-toxic and safe especially for children who are more likely to handle or inadvertently ingest them during the dyeing process.
Eco-Friendly: By utilizing ingredients commonly found in the kitchen or pantry, such as beets (how long do beets last?), spinach, or blueberries, users reduce their environmental footprint. These natural colors come from renewable resources and involve fewer pollutants compared to manufacturing synthetic dyes.
Educational: The process of making natural Easter egg dyes can be an educational experience for all ages. It provides an opportunity to explore how various natural dyes can be created from everyday food items and teaches about the origins of colorants.
Culinary Versatility: Ingredients used for dyeing can often be repurposed. Leftover vegetables and fruits from creating **dyes can be composted or reused in cooking, minimizing waste.
Aesthetic Quality: Natural dyes produce a unique and diverse range of hues that reflect the natural beauty found in food derivatives. The delicate and earthy tones achieved with natural Easter egg dyes can be quite distinct from those obtained with commercial dyes, often lending a charming, rustic look to the eggs.
In summary, natural Easter egg dyes offer a safer, more sustainable, and educational alternative to synthetic dyes while providing the added benefit of creating a unique aesthetic in Easter traditions.
Preparation for Dyeing Easter Eggs
When preparing to dye Easter eggs, one must select the right eggs and gather all necessary materials for a streamlined dyeing process. This ensures both beautiful results and an enjoyable experience.
Selecting the Right Eggs
It is important to choose white eggs because they display colors most vividly after dyeing. The eggs should be free of cracks and clean. One can opt for hard-boiled eggs if the eggs will be handled considerably, as they are less likely to break than raw eggs.
Gathering Necessary Materials
A kitchen setup for dyeing Easter eggs should include:
A pot or saucepan for boiling water and ingredients.
White vinegar, which acts as a mordant to help the eggshells absorb the dye.
A mason jar or jar for each color, suitable for the dye bath.
Paper towels for drying eggs after dyeing.
A slotted spoon or tongs for safely handling the eggs in the hot dye.
To begin, fill the pot with enough water to cover the eggs and bring it to a boil. Add the appropriate amount of vinegar—usually 1 to 2 teaspoons—to the dye bath to ensure the color adheres to the eggshell.
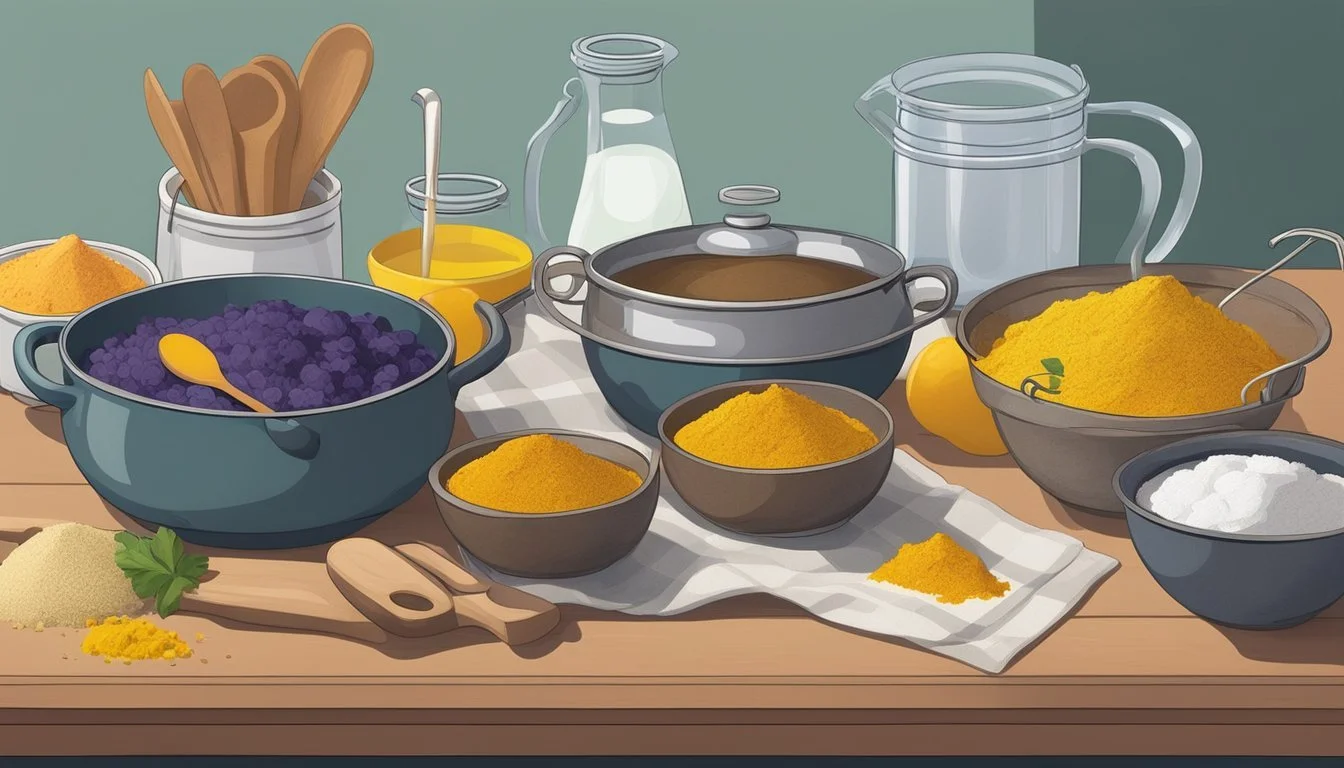
Creating Your Dye Solutions
Creating natural dye solutions for Easter eggs involves combining water, vinegar, and natural materials like vegetables and spices. These ingredients are boiled and simmered to release their colors before being used as dyes. Acidity from vinegar helps the eggshells to absorb the colors more effectively.
Yellow Dye with Turmeric
To achieve a vibrant yellow shade, mix water with turmeric, a potent spice known for its deep yellow color. Start by boiling water in a pot, then add two tablespoons of turmeric. Reduce the heat and simmer for 15 minutes to infuse the water. Strain the liquid, and add a tablespoon of vinegar to fix the dye onto the eggs, resulting in a beautiful pale yellow tint.
Pink and Red Dye from Beets
For pink to red hues, shredded red beets are excellent. One should boil shredded beets in water until the desired shade, typically a deep red, is achieved. After around 30 minutes of simmering, cool the mixture and strain. Incorporate a tablespoon of vinegar to the beet dye before submerging the eggs to attain shades ranging from soft pink to a robust red.
Green Dye Using Spinach
Green dye can be made using spinach, known for its lush color. Fill a pot with water and spinach leaves, bring to a boil, and then let it simmer until a rich green hue is released, about 30 minutes. After the mixture cools down, strain out the leaves, add vinegar to the dye, and submerge the eggs for a natural green appearance.
Blue and Purple Dye from Berries and Cabbage
Berries and red or purple cabbage create a spectrum of blue and purple shades. Boil either blueberries for a more vivid blue or shredded purple cabbage for lavender to light blue shades. Simmer for 15 to 30 minutes, let it cool, and strain. Mix the dye with vinegar before dyeing the eggs to achieve colors from soft lavender to royal blue.
Rust and Brown Dye with Onion Skins and Tea
For rust and brown tones, yellow and red onion skins or black tea are ideal. Boil the onion skins or brew the tea in water until it reaches a rich, deep shade. Simmering for 30 minutes usually suffices. Once cooled and strained, add a tablespoon of vinegar to ensure the eggs take on a warm, earthy color from light brown to dark rust.
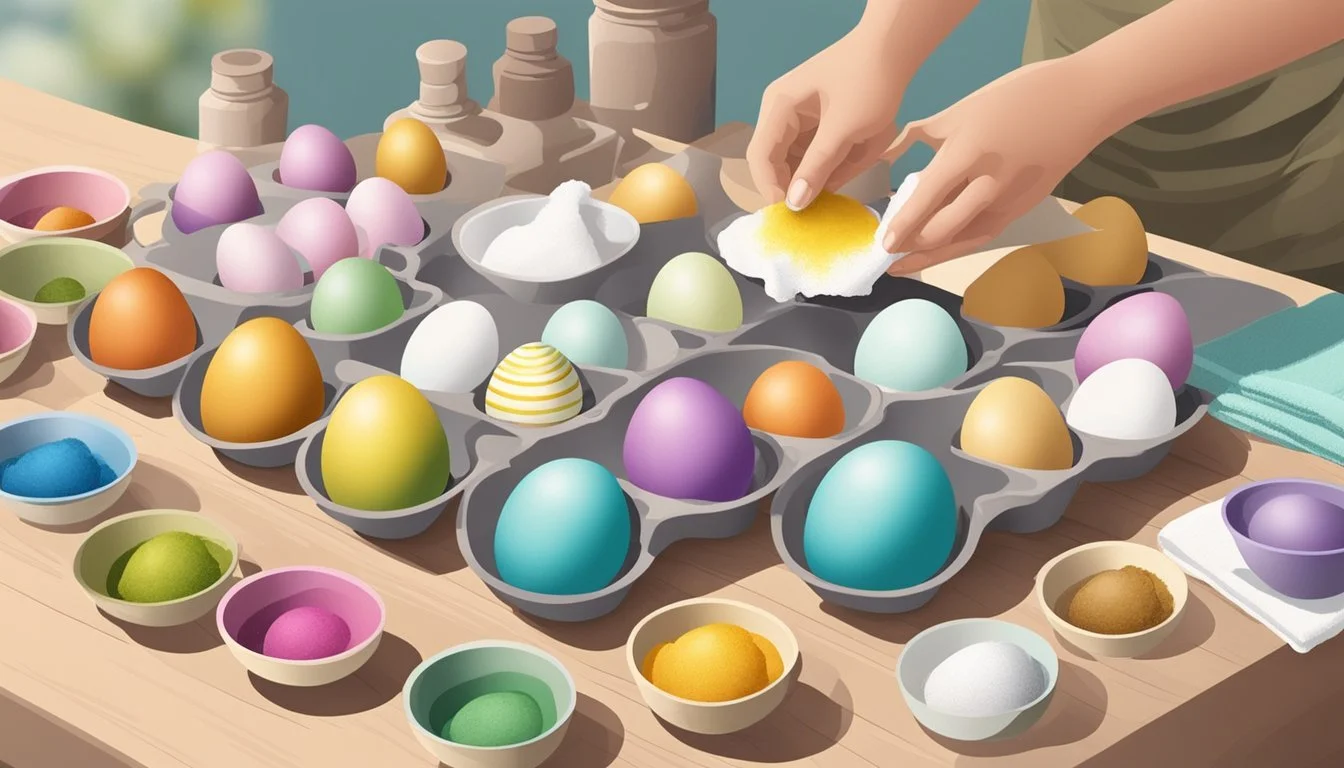
Dye Application Techniques
When dyeing Easter eggs naturally, precise techniques can significantly affect the outcome of the egg's color and design. Proper application can lead to vibrant colors and unique patterns on hard-boiled eggs.
Dipping and Soaking
For a uniform color, dipping and soaking is the go-to method. One simply immerses hard-boiled eggs into a prepared dye solution, which can include natural dye ingredients like purple cabbage, onion skins, or turmeric. The eggs need to be submerged for at least 30 minutes, although leaving them in the refrigerator in the dye overnight can result in deeper hues. It’s important that the dye is lukewarm to avoid cooking the eggs further.
Creating Patterns and Textures
To add intrigue with patterns and textures, a variety of household materials can be employed. Wrapping eggs with rubber bands before dyeing can create stripes, whereas rice or beans added to the dye can impart a speckled effect. One can also dab vegetable oil on the egg before dyeing to produce a marbled look. One should wear latex gloves to avoid staining hands and to handle eggs gently during this process. Applying these materials requires creativity and a gentle hand to avoid cracking the eggs.
Achieving Different Color Shades
The pursuit of different color shades can be systematic. Using a color glossary as a reference, one can produce a spectrum from muted colors to vibrant ones by adjusting soaking time. A quick dip results in lighter shades, while extended soaking leads to more intense colors. Additionally, adding more layers of dye by repeated dipping can achieve richer colors, as can adjusting the pH balance with vinegar for brighter shades or baking soda for more muted tones. The final shade also depends on the original color of the egg.
Through these techniques, eggs can be transformed into natural, homemade decorations with a variety of colors and patterns, each dictated by the choice of dye ingredients and application methods.
Securing and Enhancing the Colors
Securing vibrant colors on Easter eggs using natural dyes requires specific techniques to ensure the dye adheres effectively. The acidity of white vinegar acts as a fixative for the dye, while heat plays a pivotal role in setting the color on the eggs.
Using Vinegar as a Fixative
White vinegar is essential for enhancing egg color. The acetic acid in vinegar acts as a mordant, which helps in binding the dye to the eggshells.
Step-by-Step:
Preparation: Add 1 to 2 teaspoons of white vinegar to the dye bath.
Dye Bath: Place the prepared dye into a pot with the vinegar.
The addition of vinegar helps the eggs absorb the dye more evenly, resulting in a more vibrant and lasting color.
The Role of Heat in Setting Dye
Boiling is not just for preparing the dye; it also sets the color onto the eggs. The process of simmering the dye with the eggs in hot water helps the colors adhere better and become more pronounced.
Process:
Simmering: After adding eggs to the dye, simmering them over low heat for 15 to 30 minutes can deepen the hue.
Cooling: Let eggs sit in the dye after boiling until a desired color is achieved.
Through these methods, one can secure richer, more enduring colors on naturally dyed Easter eggs.
Alternative Easter Egg Decorating Ideas
Easter egg hunts and the tradition of decorating eggs can be enhanced with creative and natural alternatives to conventional dyeing methods. These ideas can also serve as engaging centerpieces for the Easter table.
Decoupage Eggs
One can bedeck eggs with thin layers of decorative paper using the decoupage technique. It involves brushing a layer of glue over the egg and gently laying pieces of paper on it, providing a unique and intricate decoration.
Table 1: Decoupage Materials
Material Purpose Decorative paper To cover the egg’s surface Glue or ModPodge To adhere the paper to the egg Paintbrush To apply glue and smooth out the paper
Natural Rubbings
Eggs can be adorned with leaf and flower patterns through natural rubbings. Simply place a leaf or flower against the egg and cover it with a piece of pantyhose to hold it in place. Gently apply natural dyes, and the egg will take on the delicate imprint of the plant.
Sticker Resist Technique
Children may enjoy the sticker resist technique, which involves placing stickers on the eggs before dyeing. Once the dyeing process is complete and the egg is dry, one can remove the stickers, revealing the original color beneath in fun shapes.
List of Materials for Sticker Resist Technique
Stickers (any shape)
Hard-boiled eggs
Dye solution (natural or otherwise)
Herbal Silhouettes
Using fresh herbs to create silhouettes on eggs results in a tasteful and natural aesthetic. One places the herb on the egg, wraps it with a pantyhose piece, and then dips the egg into a dye. After drying, remove the wrap to reveal an herb silhouette.
As one experiments with these innovative decorating approaches, Easter eggs transform into artistic expressions of the season, resonating with the joyous essence of tradition.
Safety Tips and Considerations
When dyeing Easter eggs with natural and homemade dyes, safety is paramount. Here are key considerations to ensure a safe and enjoyable experience:
Natural Ingredients:
Use gloves when handling ingredients that can stain hands, such as beet juice or turmeric.
Ensure all natural ingredients are edible and free from spoilage.
Wash all produce used in dye-making to remove potential pesticides.
Chemicals:
Avoid using any containers or utensils that have previously held chemicals or non-food substances.
Store-bought dyes should be labeled non-toxic; keep away from children's reach.
Food Safety:
Keep eggs refrigerated until use to prevent spoilage.
After dyeing, eggs should be returned to the refrigerator promptly.
Consume dyed hard-boiled eggs within one week.
Additional Considerations:
Provide a well-ventilated space to boil dye ingredients and vinegar.
Use stainless steel or glass pots to avoid staining cookware.
Do Don't Supervise children at all times. Leave dye baths unattended. Label utensils for dye use only. Use cracked eggs for dyeing. Dispose of excess dye properly. Pour leftover dye down the sink.
Above all, remember to keep the process simple and have fun. Using natural dyes can be a delightful way to celebrate the holiday while staying mindful of safety and health.
Cleaning Up and Storing Dyed Easter Eggs
After the fun of dyeing Easter eggs, proper cleanup and storage ensure their preservation. It's best to approach this methodically to maintain both the kitchen's cleanliness and the vibrancy of your eggs.
Cleanup Steps:
Wash utensils: Any spoons, bowls, or mason jars used in the dyeing process should be rinsed with warm soapy water immediately after use to prevent staining.
Dispose of dye solutions: If using homemade or natural dyes, one should safely dispose of the remaining liquid.
Wipe surfaces: Clean any spills with a sponge or paper towel to avoid any permanent marks on counters or tables.
Storing Dyed Easter Eggs:
Preparation:
Ensure the eggs are completely dry before storing.
Use paper towels to gently pat them down if necessary.
Refrigeration:
Place eggs in a single layer in an egg carton or on a tray.
The refrigerator is the ideal place for storage to keep eggs from spoiling.
Maintenance:
Check regularly for any cracks or signs of spoilage.
Keep the eggs away from foods with strong odors to prevent flavor transfer.
Container Options:
Container Benefit Note Egg Carton Protects from cracks Best for short-term storage Mason Jar Airtight storage Suitable for individual egg display Sealed Container Minimizes exposure to odors Ensure sufficient space to prevent damage
Remember, one must store the eggs at a consistent temperature within the fridge to prolong their freshness. By following these steps, the Easter eggs will remain a vibrant part of the holiday decor for the entire season.
Conclusion
Dyeing Easter eggs naturally is a tradition that combines creativity with environmental mindfulness. By using ingredients often found in one's kitchen or garden, individuals can produce a spectrum of vibrant colors. The process involves simmering natural dye materials in water, with the addition of vinegar to aid color absorption.
The dyes, derived from nature, offer a safe and chemical-free alternative. One might use blueberries for a bluish tint or turmeric for a bright yellow. The depth of color achieved can vary with the duration the eggs are left in the dye, allowing for a range of hues from pastel to rich tones.
This method not only revives an age-old custom but also engages all ages in a sustainable craft. It serves as a reminder of the simplicity and beauty of using natural resources. Indeed, the practice of making natural Easter egg dyes aligns with the essence of Easter—renewal and life.
Natural Dye Source Expected Color Blueberries Blue Turmeric Yellow Beets Pink/Red Onion Skins Orange/Brown
In following these practices, families maintain the festive spirit of Easter while embracing eco-friendly approaches. The result is not only a collection of beautifully colored eggs, but also a contribution to a healthier planet.
