
Free Land and DIY Construction
A Guide to Building Your Dream Home
Building your own home on free land is not only a feasible project but also an exciting opportunity to create a personalized living space from the ground up. Obtaining free land can significantly reduce the overall costs involved in constructing your home, making homeownership more accessible than ever. The process involves meticulous planning, from site preparation and securing the right type of loan, to choosing materials and finishes that suit your lifestyle and budget.
Many are drawn to the idea of DIY home construction as it allows them to have complete control over the design and execution of their dream home. This process begins with clearing the building site, surveying the lot, and laying a strong foundation—fundamental steps that set the stage for every other phase of construction.
For those interested in simplifying the design aspect of their build, online tools like Canva’s home design software offer user-friendly solutions for crafting custom floor plans. By combining modern technology with traditional building techniques, anyone can turn a piece of free land into a cherished home.
Planning Your DIY Home Build

Planning your DIY home build involves several critical steps ranging from understanding local regulations to securing financial resources. Each step requires careful consideration and thorough preparation to ensure a smooth construction process.
Understanding Local Building Codes
Understanding local building codes is essential when planning to build your own home. These regulations ensure that construction meets safety and environmental standards. Consult with the local building department to get detailed information about zoning laws, permits, and inspections required.
Speak with a local real estate agent who can provide insights on community-specific restrictions. Neglecting these codes might result in fines or legal issues, halting your project. Always factor in building codes early to avoid costly revisions later.
Selecting and Buying Land
Selecting and buying land is a foundational step in the home-building process. Choose a location that aligns with your lifestyle and future resale value. Proximity to essential services like schools, hospitals, and shopping centers can add significant value.
Hire a local real estate agent to help you navigate options, negotiate prices, and understand land use regulations. Be mindful of the land's topography and soil quality, which can affect construction costs. A thorough survey and land assessment are crucial before making a purchase.
Designing Your House Plan
Designing your house plan is where your vision starts to take shape. Collaborate with an architect or use architectural software to create detailed plans. Consider factors such as room layout, natural lighting, and energy efficiency.
Creating a comprehensive house plan helps in visualizing the entire project and makes it easier to communicate with contractors. Ensure the design complies with local building codes. Detailed plans also aid in precise budgeting and scheduling.
Setting a Realistic Budget
Setting a realistic budget ensures that you can complete your project without financial strain. Begin by listing all potential expenses, including land purchase, permits, materials, labor, and contingency funds.
Get quotes from multiple suppliers and contractors for the most accurate cost estimates. Factor in unexpected expenses by adding 10-20% to your initial budget. This buffer can cover unforeseen problems or changes during construction.
Securing a Construction Loan
Securing a construction loan is a vital step in financing your build. A construction loan differs from traditional mortgages; it funds the build phase and converts to a mortgage once the house is complete.
Consult with lenders to understand the loan terms and interest rates. Prepare a comprehensive loan application that includes your house plan, budget, and a construction timeline. A well-detailed application increases your chances of loan approval, making the process smoother.
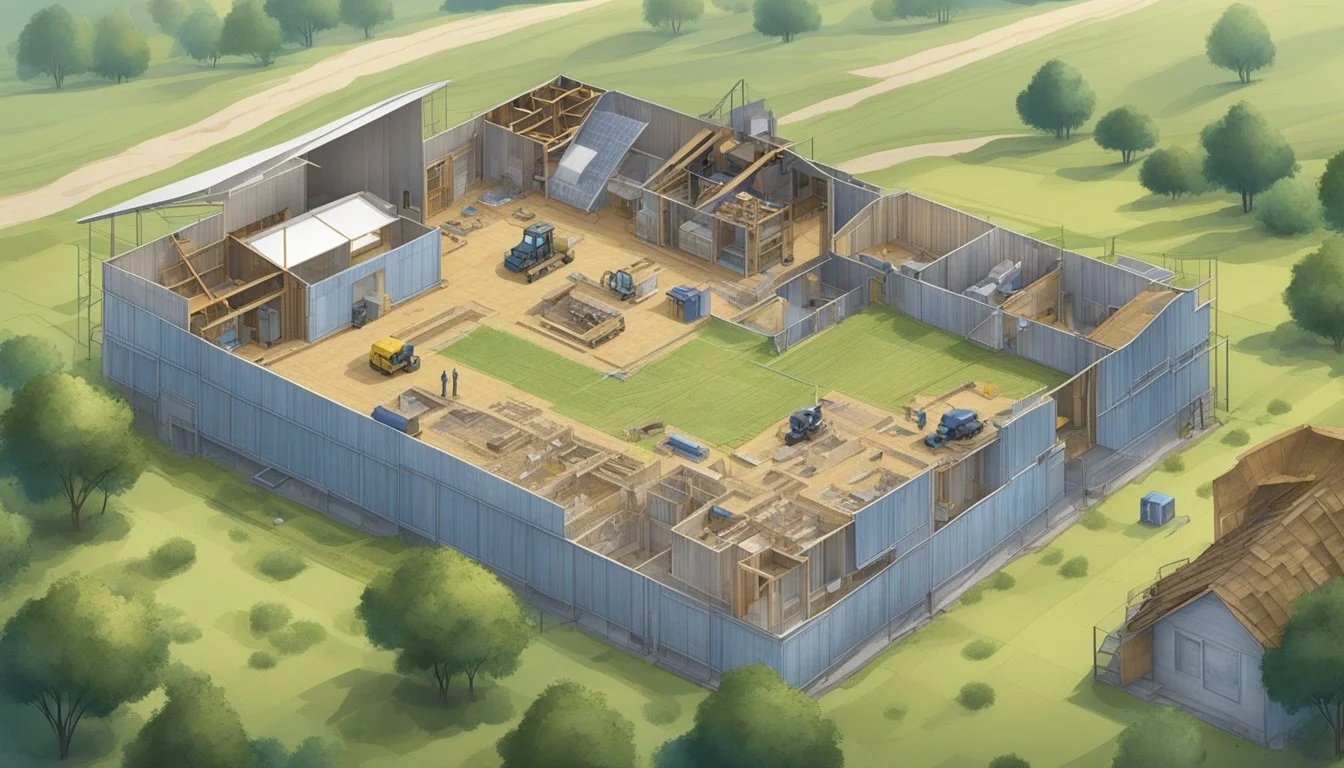
Laying the Groundwork

Before construction can commence, it's vital to prepare the site meticulously, focusing on clearing and excavation, pouring the foundation, and considering the options for basements and crawl spaces, which are integral for the stability and longevity of your home.
Clearing and Excavation
The first step involves clearing the land of any vegetation, debris, and structures. This process ensures a clean slate for excavation. It’s essential to work with local utility companies to mark any underground lines to avoid accidents.
Excavation then begins, shaping the land for the foundation. This involves digging to the required depth and size based on architectural plans. Accurate excavation helps prevent future structural issues. Contractors often use heavy machinery like bulldozers and excavators for efficient and precise work.
Pouring the Foundation
Laying the foundation is critical. It acts as the base that supports the entire structure. Footings are poured first, which distribute the weight of the home evenly and prevent settling. The type of foundation—whether a slab foundation, crawl space, or full basement—depends on your needs and local conditions.
Foundation walls are constructed following the footings. They provide additional support and act as a barrier against moisture. Proper waterproofing techniques should be applied to prevent water damage, which can compromise the foundation's integrity. Common methods include applying waterproof coatings and installing proper drainage systems.
Basement and Crawl Space Considerations
If opting for a basement, ensure adequate waterproofing to avoid water seepage, using materials like waterproof membranes and drainage tiles. Basements provide additional living or storage space but require careful attention to ventilation and humidity control.
Crawl spaces, on the other hand, offer easier access to plumbing and electrical systems. They must be ventilated properly to prevent moisture buildup, which can lead to mold and structural damage. Insulate crawl space walls and floors to maintain temperature and reduce humidity effectively.
Proper planning and execution in these areas ensure a strong and durable structure. Each step must be completed with precision to lay the groundwork for your future home effectively.
Constructing the Framework
This phase involves framing the structure, installing windows and doors, and applying sheathing and roofing. Each step requires precision and careful planning to ensure the home's stability and functionality.
Framing the Structure
Framing is the skeleton of the building. It begins with constructing the floor plan layout using joists and trusses as the foundation. The walls are raised next, starting with the studs, which are typically spaced 16 or 24 inches apart. Key areas like doorways and windows are framed with headers and king studs to support weight.
The tools needed include hammers, nails, saws, and levels. Materials often used are lumber, nails, and metal brackets. Each piece of wood must be measured and cut precisely to match the design specifications. The entire structural framework is crucial in providing support for all other construction elements.
Installing Windows and Doors
Once the basic frame is up, installing windows and doors is next. Openings for windows and doors should align with the plans, considering both size and placement. It's important to install flashing around these openings to prevent water from seeping in.
Windows are generally fitted into place using shims to ensure they are level. After windows, doors are installed, focusing on making sure they swing correctly and seal properly when closed. Using the right materials and tools such as caulk, shims, levels, and screws ensures proper fitting and long-term durability.
Applying Sheathing and Roofing
Sheathing is applied to the exterior of the framed structure to add strength and create a surface for other finishes. Typically, plywood or OSB (Oriented Strand Board) is used as sheathing material. Each panel is nailed in place, ensuring they are flush and secure.
Following sheathing, roofing begins by laying down a waterproofing layer like tar paper or synthetic underlayment. Adding shingles or other roofing materials helps protect the home from weather elements. The roofing process requires careful attention to detail, using tools like hammers, nails, roofing knives, and chalk lines for precise cuts and placements.
The combined efforts in framing, installing windows and doors, and applying sheathing and roofing create a robust and weather-resistant structure.
Essential Systems and Insulation

Addressing essential systems and insulation is crucial to ensuring your home is energy-efficient and comfortable. Thoughtful planning for plumbing, electrical work, HVAC systems, and insulation will impact the overall quality and functionality of your home.
Plumbing and Electrical Work
Effective plumbing involves designing a layout that accommodates water supply lines and drains. Start by identifying the locations for bathrooms, kitchen, and laundry areas. Using high-quality pipes and fixtures is essential. Flexible piping like PEX can be easier to install and resistant to leaks.
Electrical work requires comprehensive planning for outlets, lighting, and major appliances. It is recommended to hire a licensed electrician to handle the complexities. They will ensure that the wiring meets local building codes and safety standards. Key components include circuit breakers, wiring, switches, and outlets. Planning for future needs by adding extra outlets and conduits can save time and money in the long run.
Installing HVAC Systems
A well-installed HVAC system guarantees comfort throughout the year. Start with a detailed load calculation to determine the appropriate size of the system for heating and cooling needs. Options include central air conditioners, heat pumps, and split systems.
Ductwork design should minimize air resistance and be properly sealed to prevent leaks. Thermostats, whether programmable or smart, can enhance energy efficiency. Proper ventilation is also critical to maintaining air quality. An HVAC specialist can help ensure all components are correctly installed and comply with local regulations.
Insulation and Drywall
Insulating your home is key to energy efficiency, providing barriers against heat loss in winter and heat gain in summer. Common insulation materials include fiberglass, foam boards, and spray foam. Walls, attics, and floors are primary areas where insulation should be applied. High-performance insulation in the walls and attic can significantly reduce energy costs.
Installing drywall provides structure and finishes interiors. Begin by measuring and cutting drywall panels to fit the spaces. Use screws to attach panels to the wall studs securely. Mud and tape the seams, then sand and finish to create a smooth surface ready for paint. Proper drywall installation enhances the durability and aesthetics of your home's interior spaces.
Interior and Exterior Finishes

When constructing a home, paying close attention to the interior and exterior finishes is crucial. This section covers essential aspects such as selecting the right cabinetry, using durable exterior siding, and finishing the floors and walls with appropriate materials.
Choosing Interior Details
Selecting interior details involves decisions about cabinets, countertops, paint, and molding. Cabinets need to be both functional and aesthetically pleasing. Popular materials for countertops include granite, quartz, and laminate due to their durability.
Paint colors should complement the overall design and can influence the mood of each room. Interior walls might require extra attention if installing custom molding or trim. The finish of these walls can be smooth or textured, based on preference.
Applying Exterior Siding
The choice of exterior siding significantly affects the home’s appearance and durability. Options like vinyl, wood, fiber-cement, and brick each have their benefits. Vinyl is cost-effective and low maintenance, while wood provides an attractive, classic look but requires more upkeep.
Fiber-cement is durable and weather-resistant. Additionally, proper installation is key to preventing moisture issues. Ensuring the siding is correctly sealed and painted will enhance its longevity and appearance.
Flooring and Painting
Flooring choices range from hardwood to tile and carpet. Hardwood flooring is valued for its durability and timeless appeal. Tile is suitable for areas prone to moisture, like kitchens and bathrooms.
Carpet adds comfort to bedrooms and living areas. Once the flooring is installed, painting is the next step. Selecting high-quality paint for interior walls ensures a smooth finish and easy maintenance. Light colors can make rooms appear larger, while darker shades add a cozy feel.
These finishes contribute significantly to the functionality and aesthetics of a home, making them vital in the home-building process. Choosing the right materials and executing the finishes with precision ensures a beautiful and lasting outcome.
Final Touches and Closing Procedures

In the final stages of building your own home, focus on installing essential fixtures and appliances, ensuring compliance through thorough inspections, and performing a detailed final walkthrough before closing.
Installing Fixtures and Appliances
One of the last steps in home construction is installing fixtures and appliances. This includes setting up lighting fixtures, sinks, faucets, and necessary kitchen appliances like a stove, refrigerator, and dishwasher. Consider energy-efficient options to save on future utility costs.
Positioning furniture may help visualize space utilization, but it is usually best to wait until after closing for full setup. Proper cleaning of new fixtures and appliances is crucial to ensure they work effectively from the start.
Building Inspections and Compliance
Before the house can be finalized, it must undergo several inspections to ensure it meets all safety and building codes. These inspections check structural integrity, electrical systems, plumbing, and HVAC installations.
Acquiring all required permits, including the final building permit, is essential. Without these approvals, closing procedures may be delayed, potentially incurring additional costs and complications.
Executing the Final Walkthrough
The final walkthrough is a critical step where buyers inspect the home to ensure everything is completed to their satisfaction. During this process, they should check for any missing fixtures, incomplete work, or damage requiring repairs.
Buyers often bring a checklist to ensure every aspect, from electrical outlets to plumbing fixtures, is functional. This walkthrough occurs shortly before closing, making it one of the last chances to address any issues before moving in.
Hiring Professional Help

When building your own home, professional help can be essential in ensuring quality and adherence to regulations. This includes contractors, subcontractors, and an architect, who each play specific roles.
Working With Contractors and Subcontractors
Contractors are pivotal in managing the overall construction process. They coordinate tasks, ensure timelines are met, and handle procurement of materials. Subcontractors specialize in specific trades such as plumbing, electrical work, and carpentry.
Hiring a general contractor can be beneficial for overseeing and managing these specialists. Clear communication with both contractors and subcontractors is crucial to avoid misunderstandings and delays.
Key Roles: Organize tasks, manage timelines, procure materials
Specialties Involved: Plumbing, electrical, carpentry
Collaborating with an Architect
Architects play a significant role in designing your home and ensuring it meets structural and aesthetic standards. When you hire an architect, they can help turn your vision into detailed blueprints and specifications.
Architects also coordinate with contractors to ensure the design is executed correctly. This collaboration between an architect and builders is essential for resolving design issues that may arise during construction.
Importance of an Architect: Design, structural integrity, aesthetics
Coordination: Work with contractors, ensure design accuracy
Building and Leading Your Team
Building a team involves selecting individuals and firms that can work well together. This includes not only contractors and architects but also various subcontractors. Each team member should understand their responsibilities and how they fit into the overall project.
Strong leadership and clear communication are essential for a cohesive workflow. Leading your team effectively helps maintain a smooth construction process and can address potential issues promptly.
Team Members: Contractors, architects, subcontractors
Essential Skills: Leadership, communication, problem-solving
DIY Home Build Advantages

Building your own home comes with many compelling benefits. Key advantages include the ability to customize your space, significant cost savings, and the deep sense of pride that comes from completing a large project yourself.
Customizing Your Own Space
One of the most appealing aspects of a DIY home build is the high level of customization. You can design the layout, select materials, and choose finishes that are best suited to your lifestyle and tastes.
Whether it’s a spacious kitchen, a home office, or a custom-built bookshelf, every detail can reflect your personal preferences. This level of control ensures that the final home meets specific needs and desires. Unlike purchasing a pre-built house, building a new house yourself allows for an array of design possibilities.
Cost Savings and Budget Control
Building your own home can be surprisingly affordable. By taking on tasks yourself, you can significantly reduce labor costs. Only spending on necessary contractor work helps to manage your budget better. Another financial benefit is the ability to choose cost-effective materials and finishes without sacrificing quality.
Many find this freedom enables more efficient allocation of funds. Instructor-led DIY programs and community workshops offer further avenues for learning while saving money. The total expense of a custom home can often be much less than buying a comparable pre-built house.
Self-Satisfaction and Pride of Ownership
Creating a home from scratch offers substantial personal rewards. The process involves investments of time, energy, and money, resulting in a unique sense of accomplishment. Each completed task contributes to a growing feeling of pride and ownership.
Additionally, the fun and educational aspects should not be underestimated. Engaging with every stage from planning to execution instills valuable practical skills. Pride of ownership is amplified when the final product is a direct result of hands-on effort and perseverence.
Long-Term Maintenance and Upkeep

Ensuring the longevity and efficiency of your DIY home involves creating a maintenance routine and planning for future renovations.
Establishing Maintenance Routines
Routine maintenance is crucial for preserving the quality and functionality of a home. Schedule inspections for key areas such as roofing, plumbing, and electrical systems annually. Gutter cleaning should be performed at least twice a year to prevent water damage.
HVAC systems need regular filter replacements, ideally every 1-3 months, depending on usage and air quality. Testing smoke and carbon monoxide detectors monthly enhances safety measures. Also, seasonal tasks like winterizing outdoor faucets and servicing the heating system before cold weather are essential.
Using a checklist can simplify these regular tasks. Investing in high-quality materials from the start, like vinyl or aluminum-clad windows, can reduce long-term maintenance needs significantly.
Planning for Future Renovations
When building your own home, it's wise to consider future renovations. Even the best-built homes will eventually require updates or expansions. Plan for these by installing adaptable infrastructure, such as spaced-overhead wiring and flexible plumbing lines that allow easy access for upgrades.
Consider materials with longevity, such as solid hardwood flooring and durable countertops like quartz, which require minimal upkeep and look good over time.
Create a renovation fund early on to avoid financial strain. Prioritizing energy-efficient upgrades, such as installing solar panels or energy-efficient windows, can yield long-term savings and increase property value. Regularly review and update this plan as the home ages and your needs evolve.
