
How to Make a Perfect Pie Crust by Hand
Master the Art of Pastry Dough
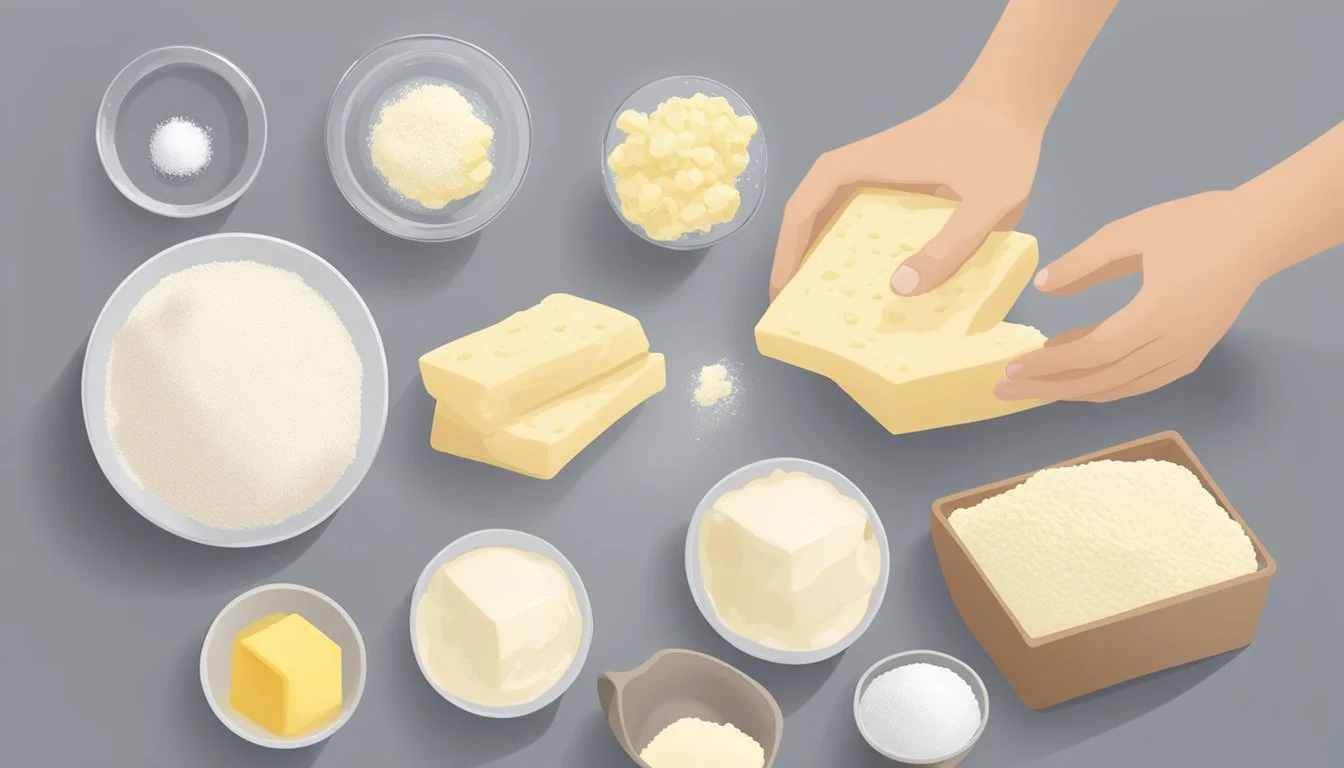
Creating a perfect pie crust by hand is a fundamental skill that marks the difference between an average homemade pie and an exceptional one. The process of making a homemade pie crust involves combining flour, fat, and a small amount of water. The key to a flaky crust is the proper incorporation of butter or shortening into the dry ingredients, which helps to create layers in the pastry as it bakes. A successful pie crust is tender, buttery, and has just the right amount of crumble, serving as a sturdy and flavorful foundation for both sweet and savory fillings.
To tackle this culinary challenge, one begins with quality ingredients measured with precision. Cold butter is often preferred as it lends to the flakiness of the crust once baked. The butter is cut into the dry ingredients either using tools such as a pastry blender or by hand, ensuring the mixture develops a coarse, pea-sized crumb. Keeping all elements cold works to a cook's advantage by retaining the bits of fat essential for texture.
A touch of ice water unites the ingredients, but caution is required; too much will toughen the crust, while too little can leave it crumbly and difficult to roll. They gently work the dough to bring it together before shaping and chilling it, setting the stage for a well-structured pie. With each meticulous step, the maker transforms simple components into a culinary canvas, ready to be filled and presented as the ultimate homemade delicacy.
Essential Ingredients
Perfecting the pie crust begins with choosing high-quality, appropriate ingredients. Each element, from flour to fats and seasoning agents, plays a pivotal role in texture and flavor.
Selecting the Right Flour
The foundation of pie crust is flour. For a tender and flaky crust, pastry flour with a lower protein content is ideal. It minimizes gluten formation, ensuring that the dough isn't too tough. All-purpose flour is a reliable alternative, offering a balance between tenderness and structural integrity.
Understanding Fats
Fats are crucial for the flakiness of the crust. Butter imparts a rich flavor and contributes to the flaky layers. It should be cold and cut into small pieces to distribute evenly through the flour. Some bakers also use shortening or lard to achieve an even more tender result because they have a higher melting point than butter, which can enhance texture.
The Role of Salt and Sugar
A small amount of salt enhances the overall taste and balances sweetness. Half a teaspoon to one teaspoon depending on the recipe size is usually sufficient. Sugar, while optional, can be added for a touch of sweetness and to promote browning. One to two tablespoons of sugar, according to the desired sweetness level, will suffice.
Preparing the Dough
Making a perfect pie crust by hand involves precision in cutting in the fat, carefully hydrating the mixture, properly forming the dough, and allowing it enough rest. Each step affects the crust's texture and flakiness.
Cutting in the Fat
To achieve a flaky texture, one must start by cutting cold butter into the flour mixture until it resembles coarse crumbs. A pastry cutter or two forks are the ideal tools for this job, allowing the butter to be distributed evenly without warming it too much.
Step Tip 1. Measure flour in a large bowl Ensure all dry ingredients are well mixed. 2. Add cold, cubed butter Butter should be as cold as possible. 3. Cut the butter into the flour Stop when the mixture is crumbly with pea-sized butter bits.
Hydrating the Mixture
Slowly add ice water, starting with a few tablespoons, to the flour and butter mixture. It's crucial to add just enough water to bring the ingredients together without making the dough wet or sticky.
Sprinkle a few tablespoons of ice water over the dough.
Stir gently, and only add more water if there are dry spots.
Forming the Dough
Once the mixture is adequately hydrated, it's time to form the dough. One should gently bring the mixture together into a coherent ball of dough, being careful not to overwork it, as that can lead to tough crusts.
Gather the crumbly dough together.
Gently press into a round shape and flatten into a disc.
Resting the Dough
After shaping, the dough must rest. Wrap it tightly in plastic wrap and refrigerate. This chilling period allows the gluten to relax and prevents shrinkage during baking.
Chill the dough for at least an hour.
For best results, let it rest overnight.
Rolling and Shaping
The perfect pie crust requires careful rolling and shaping to achieve a uniform thickness and a decorative edge. Rolling out the dough to the right thickness and creating vents are also crucial for ensuring the filling cooks evenly and the crust becomes flaky.
Rolling Techniques
To roll out pie dough, one should use a rolling pin on a lightly floured surface to prevent sticking. They begin from the center of the dough, applying even pressure and working their way outwards until the dough reaches the desired thickness—typically about 1/4 inch. It is important to frequently rotate the dough to maintain a circular shape and uniform thickness.
Shaping and Fluting
Once the dough is rolled out, the next step is to carefully transfer it to the pie dish. One technique is to loosely roll the dough around the rolling pin and then unroll it over the dish. They should then gently press the dough into the corners of the dish without stretching it. The edges can be trimmed to about 1/2 inch overhang. For a decorative touch, one can crimp the edges by pinching the dough between their fingers or using a fork to create a pattern, which also helps to seal the edge.
Handling the Dough
Handling the dough should be done swiftly to keep the pie crust flaky. Overworking the dough can lead to a tough crust. If the dough becomes too warm and soft, it may be necessary to refrigerate it for 15 to 30 minutes before continuing to work with it. Using tools like parchment paper can aid in transferring the dough and a pastry blender can help distribute fat evenly for a flakier texture.
Creating Vents for Steam
Vents are crucial for allowing steam to escape, which prevents the crust from becoming soggy. Before baking, one should cut several small slits at the top of the pie crust, using a sharp knife. For double-crust pies, they ensure the top and bottom crusts do not puff apart. The size and pattern of vents can vary according to one's preference, but it should be enough to release steam effectively.
Refrigeration and Freezing
Proper refrigeration and freezing are crucial to achieving a flaky, tender texture in homemade pie crusts. Both play a critical role in pie crust preparation, impacting the dough's temperature and hydration balance.
Chilling the Dough
One must chill the dough before rolling and baking to prevent the butter from melting. This step ensures the crust retains its shape and enhances the flakiness of the final product. The process involves:
Wrapping the dough in plastic wrap.
Refrigerating for at least 1 hour or, ideally, overnight.
While rolling out the dough, it should stay cool to touch; if it warms, refrigerate it again briefly.
Freezing Tips
Freezing pie dough extends its usability and offers convenience for future pie-making endeavors. To successfully freeze pie dough:
Use a recipe: Opt for a dough recipe with high fat and low liquid content to reduce ice crystal formation.
Wrap thoroughly: First, in plastic wrap, then place it inside an airtight plastic bag to prevent freezer burn.
Stack rolled-out crusts: Separated by waxed paper or plastic and then sealed in a large freezer bag.
When one is ready to use the frozen dough, it should be thawed in the refrigerator, not at room temperature, to maintain the desired texture.
Baking Techniques
Crafting the perfect pie crust by hand not only involves the preparation of the dough but also the baking process, which is crucial in achieving that ideal texture and stability. The technique of blind baking is central for pies with moisture-rich fillings or where the filling requires little to no cooking.
Blind Baking Fundamentals
Blind baking a pie crust is the process of pre-baking the crust before adding the filling. This technique prevents the crust from becoming soggy when using a wet filling. To blind bake a pie crust, one must:
Preheat the oven according to the pie recipe instructions, usually between 375°F to 425°F.
Prepare the crust by rolling it out and fitting it into the pie dish. Trim any excess dough from the edges.
Chill the crust in the freezer for 15 minutes to firm up, which helps prevent shrinking.
Line the crust with parchment paper or aluminum foil, ensuring it covers the bottom and sides completely.
Fill the lined crust with pie weights, such as dried beans or rice. These weights keep the crust in shape and prevent it from puffing up.
Pro Tip: Save the beans or rice used as pie weights for future blind baking since they are no longer suitable for cooking.
Achieving the Perfect Bake for Fillings
The baking technique varies for different types of fillings:
For fillings that require cooking, like pumpkin pie, bake the pie according to the specific recipe instructions, allowing the filling to set and the crust to achieve a golden-brown color. This usually involves initially baking at a higher temperature to set the crust followed by reducing the heat to cook the filling thoroughly.
In contrast, for pre-cooked or instant fillings, the crust needs to be fully baked during the blind bake, as it won’t have additional baking time with the filling. Once the pie weights are removed:
Return the crust to the oven for an additional 5-10 minutes, or until it reaches a golden color.
To prevent over-browning, one can apply an egg wash to the edges of the crust.
Important: Always monitor while the crust bakes to ensure that it doesn't over-brown or burn.
The use of steam in baking pie crusts is typically for decorative purposes. By brushing the crust with water and scoring it, steam can escape during baking, leaving a more aesthetically pleasing finish. Additionally, steam helps create the flakiest layers in the crust by creating steam pockets within the pastry as it bakes, which is essential for textures such as puff pastry but less critical for standard pie crusts.
Properly executing these baking techniques ensures a superior pie crust, ready to complement any filling.
Troubleshooting Common Issues
Making a perfect pie crust by hand can come with its own set of challenges. However, with a few adjustments, one can easily prevent common issues such as a soggy bottom, overbrowning, and cracks or tears in the dough.
Preventing a Soggy Bottom
A soggy bottom can ruin the texture of an otherwise flaky crust. To combat sogginess:
Pre-bake the crust: Blind baking the crust before adding the filling can create a barrier against moisture.
Use a sealant: Brushing a layer of beaten egg white or melted chocolate on the bottom crust before filling helps seal the dough.
Avoiding Overbrowning
A delicate, golden crust is a sign of a well-made pie, but it's easy to overbake. To ensure even browning:
Shield the edges: Once the edges reach the desired color, cover them with foil or a pie shield.
Lower the baking temperature: If the entire crust is browning too quickly, reduce the oven temperature and extend the baking time accordingly.
Fixing Cracks and Tears
Cracks and tears can affect the structure of a pie crust but are fixable. A few tips include:
Refrigerate the dough: Chilled dough is easier to repair and less likely to tear.
Patch with dough scraps: Press excess dough into cracks or tears, then smooth the edges to seal.
Variations of Pie Crusts
Creating a pie crust by hand allows for numerous variations to suit different types of pies. Whether adjusting for sweetness, texture, or pie style, understanding these variations can enhance the overall baking experience.
Single vs. Double Crust Pies
Single crust pies utilize just one layer of pastry that lines the bottom and sides of the pie plate. Typically, the crust is made from all-purpose flour and is blind-baked before adding fillings like custard or fruit. Double-crust pies have an additional layer of dough which covers the top, sealing in the filling, such as in apple pies or pot pies. This top layer can be solid or designed with lattice work for aesthetic and practical purposes, allowing steam to escape during baking.
Sweet and Savory Adjustments
Savory pies might require a crust with less sugar, incorporating seasonings such as herbs or cheese to complement fillings like meats or vegetables. For sweet pies, sugar is often added to the dough to enhance the crust's flavor profile. The proportion of fats and the type of fat used can also vary. For instance, a double-crust pie with a savory filling may benefit from using butter for its flakiness, while sweet pie crusts can be enriched with egg yolks for a richer taste.
Alternative Pie Crusts
For those looking for a departure from traditional pie crusts, alternatives like puff pastry or a graham cracker crust are popular options. Puff pastry provides a flaky and light texture, suitable for both savory and sweet applications. It can be used for the top of a double-crust pie or as a base for a tart. A graham cracker crust is a no-bake option ideal for chilled desserts; it’s typically combined with melted butter and pressed into a dish before filling.
Advanced Techniques and Tips
To achieve a truly exceptional pie crust by hand, a few advanced techniques and strategies can make all the difference. These tips focus on enhancing flavor, tailoring the crust to the dish, and creating a beautiful presentation.
Incorporating Additional Flavor
Flavor Boosters: Infusing the crust with additional flavor can elevate a pie from ordinary to extraordinary. Consider these ingredients:
Sugar: For a sweet pie, a tablespoon of sugar can add a subtle sweetness.
Spices: A pinch of cinnamon or nutmeg complements fruit pies.
Zest: Lemon or orange zest brightens flavor profiles.
Liquid Choices: The liquid used can be plain water, but for added richness:
Use ice cold vodka instead of water to inhibit gluten formation, ensuring a tender crust.
A tablespoon of acidic vinegar can also tenderize the dough.
Working with Different Pie Dishes
Dish Material Heat Conduction Baking Time Adjustment Glass Even Often requires a longer bake time Metal Fast May need a shorter bake time Ceramic Varies Observe for color and doneness
Temperature Variations: Preheating the dish for savory pies can help achieve a crispy bottom. Always adjust bake times according to the pan's material and observe the crust for doneness.
Decorative Elements
Tools and Techniques:
Docking: Prick dough with a fork to prevent air pockets.
Latticework: Create a woven top for visual appeal.
Crimping: Pinch edges for a traditional, fluted edge.
Egg Wash: Brushing the crust with an egg wash before baking creates a golden, glossy finish. One can also sprinkle coarse sugar or sea salt for texture.
Finishing Touches: For pies with a pre-baked crust, brushing the bottom with egg white after the initial bake can create a seal to prevent sogginess from wet fillings.
FAQs and Expert Advice
Crafting the perfect pie crust by hand is an art that combines traditional techniques with culinary science. This section answers commonly asked questions and dispels myths to assist any baker in achieving a flaky and delicious pie crust.
Pie Crust FAQs
What is the secret to a flaky pie crust?
The key to flakiness lies in how the fat is incorporated. Butter should be kept cold and cut into the flour until pea-sized crumbs form.
Can you overwork pie dough?
Yes, handling the dough too much activates the gluten, which can lead to a tough crust. Mix just until the dough comes together.
Should pie dough be chilled before rolling out?
Chilling the dough for at least 30 minutes helps firm up the fat and relaxes the gluten, making the dough easier to roll and preventing shrinkage.
How do you divide dough for a double crust pie?
After mixing, divide the dough in half, with each piece weighing roughly the same. Flatten each half into a disk before chilling.
Is it better to use a food processor or mix by hand?
While a food processor can be used, mixing by hand allows for more control to prevent overworking the dough and ensures proper texture.
What ingredients do you need for pie crust?
A basic pie crust recipe typically includes flour, salt, cold butter, and water. Sugar can be added for a slightly sweet crust.
Pie Crust Myths Debunked
Myth: Adding more water makes the dough easier to work with.
Reality: Adding too much water can result in a sticky dough and a tough crust. Add just enough water for the dough to come together.
Myth: Using a rolling pin to mix the dough is a good technique.
Reality: A rolling pin should only be used for flattening the dough. Use a pastry cutter or your hands to mix the butter into the flour.
Myth: The warmer the ingredients, the better the dough will bind.
Reality: Cold ingredients prevent the fat from melting and ensure distinct layers of fat within the crust for optimal flakiness.
By understanding the importance of keeping ingredients cold, mixing to the right consistency, and handling the dough with care, one can master the art of pie-making. Remember that each ingredient and step in the recipe plays a pivotal role in the final result, so it's crucial to follow the pie crust recipe accurately.
Recipes for Practice
To master the art of pie crust making, one should practice with a variety of fillings. Starting with a classic apple pie for a sweet treat and a savory meat pie for a heartier dish allows one to experience the versatility of homemade pie crusts.
Classic Apple Pie Recipe
Ingredients:
2 1/2 cups all-purpose flour
1 teaspoon salt
1 teaspoon sugar
1 cup unsalted butter, cold and cut into cubes
6 to 8 tablespoons ice water
6 to 8 apples(how long do apples last?) , peeled, cored, and sliced
3/4 cup sugar
2 tablespoons all-purpose flour
1 teaspoon ground cinnamon
A pinch of nutmeg
Instructions:
For the crust, mix 2 1/2 cups of flour with 1 teaspoon of salt and 1 teaspoon of sugar. Add in the cubed butter and blend until the mixture resembles coarse crumbs.
Gradually add ice water, 1 tablespoon at a time, until the dough holds together without being wet or sticky.
Split the dough in half and chill for at least 1 hour before rolling out.
Toss the sliced apples with 3/4 cup sugar, 2 tablespoons flour, cinnamon, and nutmeg.
Roll out one dough ball, place it in the pie dish, add the apple mixture, and cover with the second rolled-out dough. Seal the edges and bake at 375°F for approximately 50 minutes.
Savory Meat Pie
Ingredients:
2 1/2 cups all-purpose flour
1 teaspoon salt
1 cup unsalted butter, cold and diced
5 to 7 tablespoons ice water
1 pound ground beef or lamb
1 onion, chopped
2 cloves garlic, minced
1 carrot, diced
1/2 cup beef stock
1 teaspoon Worcestershire sauce
Salt and pepper to taste
1 beaten egg (for egg wash)
Instructions:
Prepare pie crust dough as described for the apple pie, using only 1 teaspoon of salt and omitting the sugar.
Brown the ground meat with onion, garlic, and carrots, then add beef stock, Worcestershire sauce, salt, and pepper, and simmer until thickened.
Roll out the chilled dough, fit into a pie tin, and fill with the meat mixture.
Top with the second rolled-out dough, crimp the edges to seal, and brush with an egg wash.
Bake in a preheated oven at 375°F for about 35 minutes or until the crust is golden.
Practicing these recipes will help establish a good foundation for making various types of pies, from the sweet and classic apple pie to meat-containing savory pies, as well as others like pumpkin pie, lemon meringue pie, pecan pie, peach pie, and even quiche or chicken pot pie.
